
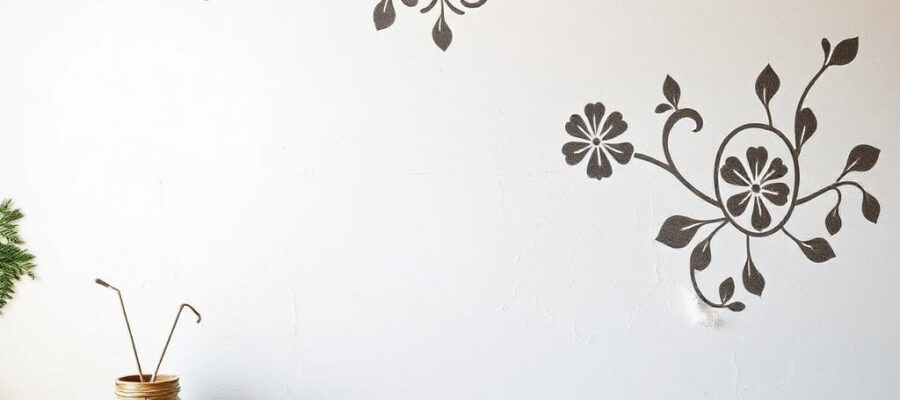
Stencil paint on a wall is much more than a simple decorative technique. It allows you to transform a smooth and uniform surface into a personalized, living and elegant table. For those who wish to personalize their spaces with a minimum of equipment, this method offers an accessible and creative alternative. At Biolotment, we believe that a wall is a perfect canvas for expressing a lasting aesthetic, and our natural paintings are ideal for this type of project. They combine respect for traditional materials and a reduced ecological impact, while offering renderings of exceptional quality. This guide will give you the key steps, practical tips and ideas to master the art of stencil with simplicity and efficiency.
Essential tools to succeed
Stencils, heart of the project
The choice of stencils is essential. The geometric, floral or abstract patterns make it possible to adapt the style to the room. Opt for resistant or metal plastic stencils, easy to clean and rigid enough to avoid burrs.
Adapted brushes and sponges
Use special brushes for stencils, with short and dense hairs, or flat sponges that guarantee a uniform application of the paint. These tools avoid overloads and obtain net edges.
Natural painting for a perfect rendering
Natural biolooking paintings are ideal for stencil work. Their slightly creamy texture ensures optimal adhesion on the surface while avoiding drips. In addition to their beauty, they give off a pleasant smell, ideal for working in a healthy environment.

Wall preparation: the key to success
Clean and repair surfaces
First of all, it is imperative to make sure that the wall is clean, dry and in good condition. Clean the traces of dust, stains and possible irregularities. Use a natural repair paste to fill the cracks and holes. A perfectly prepared wall guarantees a clear and durable stencil.
Apply a suitable underlay
The underlay for natural paintings, proposed by biolotment, is ideal for standardizing surfaces. This preparation improves adhesion and strengthens the final shade of painting, especially if you work on plaster or concrete walls.
Stencil positioning: precision and tricks
Fixing and alignment
Attach the stencil to the wall with painter ribbon. Make sure it is well tense and perfectly aligned if the pattern is repeated. Take the time to check the position, because a poorly placed stencil can disrupt the whole visual.
Work on complex areas
For corners or difficult areas, cut out parts of the stencil or use mini-pachelors. They make it possible to adapt to the curves and reduced spaces while preserving the continuity of the pattern.
Painting techniques
Stamping, a safe method
The buffer consists in tapping the paint on the stencil with a brush or a sponge. This technique limits the risks of overflow and guarantees clean contours. Take care to wipe excess paint before each application for a uniform result.
Gradient effects and shades
For a more sophisticated rendering, subtly mix several natural shades. First apply the clear shade, then add darker keys to certain areas of the stencil. This method creates delicate shadows and gives relief to the pattern.
Errors to avoid
Use too much paint
Applying too thick a layer is the most common error. This causes fuzzy drips and edges. Prefer several thin layers for a precise and clean result.
Do not wait for drying
Impatience can ruin your work. Wait until each section is completely dry before moving the stencil. This avoids spots or burrs on the patterns previously made.
The finishes for a perfect rendering
Remove the stencil with care
Gently remove the stencil before the paint dries completely. This allows you to correct any imperfections with a fine brush.
Protect the wall
Apply a natural protection layer to extend the life of your decoration. The finishes proposed by biolotment, based on wax or ecological varnish, add a slight radiance and strengthen the resistance of the patterns.
Creative ideas to go further
Combine stencils and textures
Combine the stencil work with lime plasters for subtle reliefs. For example, apply a coating layer, let dry partially, then make your patterns with a stencil. The result is rich and unique.
Play with formats
Use several stencils for a dynamic effect. Combine large central patterns with finer details to animate your walls and captivate the eye.
Maintain and renovate its reasons
Clean stencils
After each session, carefully clean your stencils with lukewarm water. Painting residues can alter the edges and make future patterns less precise.
Retouch the details
Over time, some reasons may lose their brilliance. Use a fine brush and the same natural paint to revive the tarnished or slightly deleted areas. Stencil paint on a wall is an accessible and rewarding technique that gives spectacular results. Using natural biolooking paintings, you add an ecological and aesthetic dimension to your project. Take the time to prepare, experiment and refine every detail to make your walls that are both artistic and responsible.
Latest Posts Published

The assets of the ironwork style for your gate
What elements influence the price of fuel oil?

Yucca with drooping, yellow, dry, brown leaves at the end or that loses its leaves: what to do?
How to choose tiles that you will not tire

Debout, kitchen and dining table

The advantages of combined electricity and gas offers

When and how to plant an avocado in a pot: maintenance, watering, exposure, repotting

5 ideas for arranging the basement of a house

How to choose a floor wash robot
